Sourdough Artisan Bread Loaf: A Recipe from the Farm

You could be happening upon this sourdough recipe on multiple levels of your sourdough journey. Maybe you are just beginning and want to make your first loaf of sourdough. Or maybe you’ve tried a couple recipes or are a seasoned sourdough baker and can’t wait to try a new recipe. However you have ended up on this recipe, I hope that the following information, step by step instructions, deep dive into the process as well as the tools to make this recipe is just what you are looking for! I can’t wait to share this Sourdough Artisan Bread Loaf: A Recipe from the Farm. It’s hard to beat a fresh loaf of sourdough bread.
So, let’s talk sourdough artisan bread. There is so much talk about sourdough bread, some say it is overcomplicated, some say it is what you make it. And I tend to agree with the latter. You can make sourdough as hard or as easy as you would like and this recipe is detailed and maybe a little extra BUT that is to help you achieve an artisan loaf that makes you so excited, has a signature flavor, and you can repeat again and again.
This post may contain Amazon affiliate links or other affiliate links. This is no additional cost to you. Read our full disclosure here.

A Guide to the Different Artisan Bread Recipes on TheFarmChicken:
I have multiple recipes on my website for sourdough artisan bread and I hope this will help you know which one is the best for you!
- One loaf that is great for beginners but is a lower hydration loaf and results in a tighter crumb.
- Another one is a longer ferment loaf, higher hydration and has whole wheat included.
- Then there is this one, a longer ferment loaf, 69% hydration with an oh so soft inside and webbed crumb.

The Ingredients for this Sourdough Artisan Bread Loaf: A Recipe from the Farm
- Active and Bubbly Sourdough Starter – Let’s talk about the sourdough starter. When you start on a recipe like this one you want your sourdough starter to be happy and bubbly. It should be at least doubling in size and peaked! I would focus on watching the amount of rise on your starter rather than using the float test as a measure of how ready your starter is.
- Bread Flour – I use both bread flour and all-purpose flour in my sourdough artisan bread. This helps give a beautiful crumb. Be sure to use unbleached for the best result.
- All Purpose Flour – Unbleached and just 100g. The addition of all-purpose flour gives the crumb a more webbed open look.
- Water – I use a distilled water in my loaves but any water that doesn’t have chlorine in it should work great! Room temperature works great!
- Salt – This is an ingredient that I have been doing some experimenting with. I used to use kosher or sea salt for most of my sourdough recipes but lately I have been looking into salts that don’t have anti caking agents. I have used Ballerina Farms French salt and have heard good things about Redmond Salt and Baja Gold. I am hoping to try one of those out soon!
- Rice Flour (completely optional!) – I just recently started using rice flour to dust my bannetons and loaves with. I feel as if it is not necessary and is more of a personal preference. I have had fine results with using all purpose flour. I will say though if you are going to do a very high hydration loaf (80%) you might want to consider rice flour for the inside of your banneton.

Tools to Make Your Journey Easier:
- Large Measuring Cup – This is very helpful in acing the bulk fermentation. Any container that easily shows the percentage rise would be helpful though.
- Thermometer – I invested in this thermometer and really like it for more than just sourdough in the kitchen. Knowing the temperature of your dough at the start of bulk fermentation helps you to know how much rise you should give your dough.
- Dutch Oven – Love this brand and it is what I bake all my sourdough loaves in.
- Bread Lame – I like a small bread lame. I find it easier to manage and do precision scores with.
- Banneton – Batard bannetons are my favorite!
- Bread Sling – I don’t have one of these, but I would love to get one soon. Here is the one I am looking at purchasing.
Why Autolyse?
The autolyse gives your loaf a head start on gluten formation. Whenever I do an autolyse I am so happy with the soft and easy texture of the dough when I start incorporating my sourdough starter.
This step is up to you. If you have the time, I definitely recommend it, but I still think you can make a nice loaf without an autolyse.
When Does Bulk Fermentation Begin?
This question is one that I didn’t understand well when I first started so I thought I would add it to this recipe post.
Bulk fermentation starts when you add your starter to the dough. In this recipe you let the water and flour sit for a couple hours and then add the sourdough starter which means when you add that starter to the dough is when bulk fermentation begins.
How to Complete a Coil Fold:
I like using coil folds best. However, I will use stretch and folds when it is a lower hydration dough.
To complete a coil fold:
- Start with wet hands (if the dough is sticky) then place your hands under the center of the dough and pull up. Let the dough pull from the sides and then turn the bowl a quarter turn and pull up on the dough again.
- You will pull up for a total of 4 times. Notice how the dough will get tighter as the gluten is strengthened.
- Remember: Don’t pull so much on the dough that it starts to rip it.
My Schedule for Artisan Bread:
I love using this schedule for my sourdough artisan bread. I like having a fresh loaf in the morning. You can obviously manipulate the schedule for whatever works best for you.
Feed the Starter:
- 9:30 PM Feed your sourdough starter
The Next Day:
- 8-9 AM Mix the flour and water together and dough rest
- 11 AM Add the sourdough starter once it has peaked
- 11:30 AM Add salt
- 12:00-2 PM Complete 4 coil folds
- 8-10 PM Shape and place in the fridge – this depends on the temperature of the house and dough
The Next Morning (Bake Day):
- 8-11 AM Bake the loaf
Let it cool and enjoy your homemade sourdough bread! Fresh sourdough bread is SO good!

Troubleshooting Sourdough Artisan Bread:
If you made this recipe and had some issues, I am going to be answering a few common issues that people run into when making sourdough bread:
I went to shape the dough, and it was so hard to shape. Why?
- This could be because of a couple different things but it is most commonly a sign of overfermentation. How warm was your dough? Did you leave to rise too long at too high of temperature?
- Next time I would recommend shortening the bulk fermentation and percentage rise.
I baked my sourdough bread, and it was flat and when I cut into it, it was gummy with no holes. How come?
- This points directly back to your starter. Did it at least double? When you bulk fermented your dough did it rise?
- Try feeding your starter for a couple days in a row and get a good rise on your sourdough starter before trying again.
I really wanted to get an ear and big belly on my sourdough bread. What did I do wrong?
- Most likely if you got a nice loaf but still no ear or belly it could be because of a couple things. Wrong bulk fermentation, pour shaping or not angling your cut when you did your expansion score.
- My best advice is to temp the dough and if it is around 70 degrees shape the loaf once it has just about doubled. If it is warmer shape it at an 80 percent rise.
- Follow the shaping instructions step by step and take your time.
- Make sure you have a sharp razor blade for scoring and score how the recipe instructs.
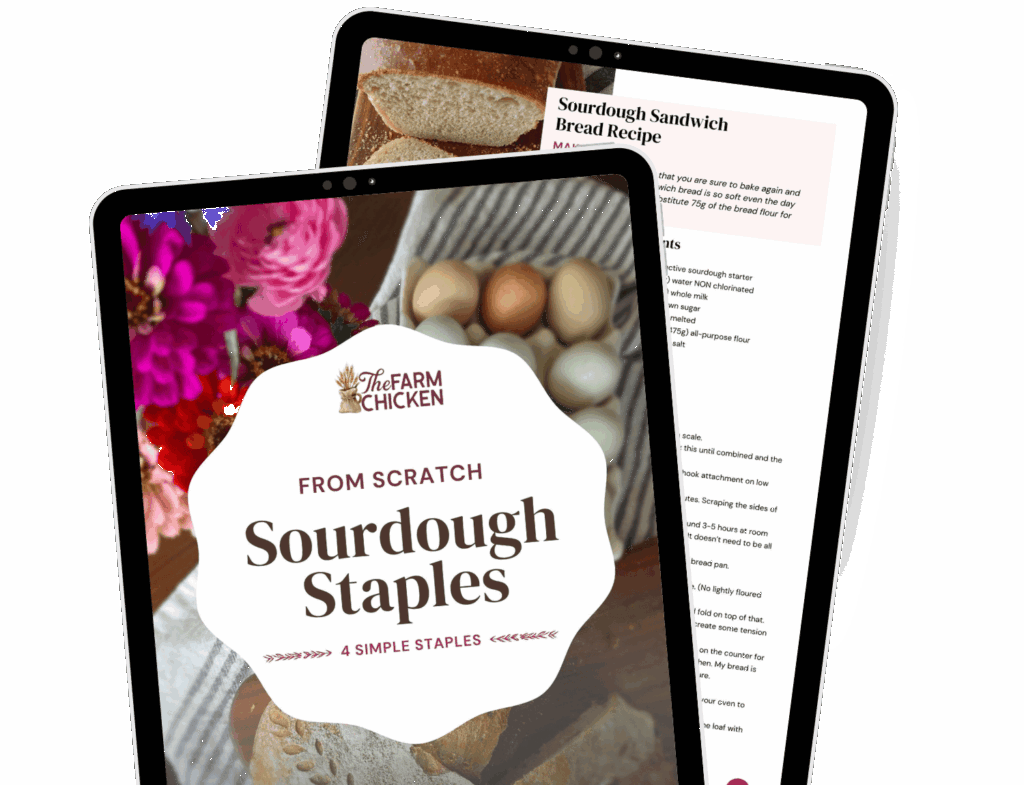
Other Sourdough Staple Recipes to Try:
- Sourdough New York Style Bagels
- Sourdough Soft and Delicious Tortillas
- Sourdough English Muffins
- Sourdough Soft Sandwich Bread Recipe
Pin for Later:

NOTE: I did this recipe in just grams as I feel like that is the best way to get amazing results with this recipe.
Sourdough Artisan Bread Loaf: A Recipe from the Farm
- 80g bubbly and active sourdough starter
- 350g bread flour
- 100g all-purpose flour
- 300g distilled or filtered water
- 8g salt (I like to use a salt without a caking agent)
- First: In a large mixing bowl or the bowl of a stand mixer add your flour and water together and mix the dough until it is shaggy in texture. Let this rest for 45 minutes. This is the autolyse.
- Second: After the 45-minute rest, knead by hand or a stand mixer for 3 minutes and let set covered for 2 hours. (This is the last of the autolyse.)
- Third: After the autolyse is complete. Add the active starter and work into the dough, kneading by hand, for 3 minutes until well incorporated. Let rest covered for 30 minutes.
- Fourth: Add the salt evenly over the top of the dough and poke with your fingers. Then knead the salt into the dough for 2 minutes.
- Fifth: Transfer your dough to an 8-cup measuring cup* cover and let rest 30-45 minutes.
- Sixth: Complete your first coil fold. Rotating a quarter turn and stretching the dough 4 times. Cover with either plastic wrap or a bowl cover and let rest 30-45 minutes.
- Seventh: Repeat this 3 more times for a total of 4 coil folds with 30-45 minute rests in-between. After the last coil fold you will let the loaf rest to finish up bulk fermentation.
- Eighth: BULK FERMENTATION – This varies so much and is the reason that I love the measuring cup to help me ace the bulk fermentation of the loaves. The loaf starts roughly at the 2.5 cup line. In a 69–70-degree room I bulk ferment my loaf for roughly 9 hours. With this temperature I usually let it double in size before I shape it. Use the picture for reference.
- If the temperature of your kitchen is warmer, 72-74 degrees, I would shape your bread at roughly the 4.5 cup line which is more like an 80% rise. I have used Sourdough Journey’s chart, and it has been helpful in getting a handle on my bulk ferment.
- Ninth: Once your dough has reached the proper bulk fermentation it is time to pre-shape your loaf. Working gently, remove the dough from the measuring cup onto a clean work surface. With your hands or a bench scraper, gently, move the loaf in a half circle forming a ball. Be sure you do not rip the dough. Let the dough rest 15 minutes on the counter.
- Tenth: This is the final shape. Make sure your banneton (I like the Batard shape best) is prepped (floured with rice flour or all purpose) before you start this final shape.
- To do the final shape gently flip the loaf over and pulling gently stretch the loaf into a small rectangle. Fold the bottom third of the dough up and the take the left side and fold it to the center followed by the right side. After that you will take and roll the dough up carefully creating surface tension as you go. Seal the ends with your fingers then pick up the loaf with your hand or bench scraper and place seam side up in the floured banneton. Be careful not to rip the dough as you are doing this. You want to keep the surface tension.
- Eleventh: Let sit for 5-10 minutes and then come back and stitch up the loaf as it usually comes apart at the seam. You can do this by taking a little of the dough on one side and pulling it over the seam pressing gently to get it to stick. Continue this until it looks like it is sewn up.
- Twelfth: Place a damp tea towel or a bowl cover over the top of the loaf and place in the fridge. NOTE – I usually put my loaf toward the back of the fridge where it is coldest. Only do this though if you know for sure that it won’t freeze.
- Thirteenth: Let the loaf rest overnight in the fridge for 8-10 hours.
- Fourteenth: Preheat the oven to 500 degrees with the Dutch oven inside a half an hour before you plan to bake the sourdough bread.
- Fifteenth: When the oven has been preheated for 20 minutes remove your loaf from the fridge place a bread sling or piece of parchment paper on top of the banneton and then flip it over.
- Dust the loaf with flour as you prefer and smooth it over the surface. Then do your design score if you want to. (TIPS: try not to go too deep with the bread lame. You want light cuts. Also, make sure your razor blade is sharp.) Once you have completed the design you planned you will then do the expansion score.
- Tips on doing the expansion score: hold the bread lame at a 45-degree angle and cut from one side to the other in one motion. Then starting at the beginning of the score take the blade and cut just under the lip of the dough. This helps you to get a beautiful expansion and “big belly” on your sourdough.
- Sixteenth: Using the bread sling or a sheet of parchment paper as a lifter, lift the loaf into the hot Dutch oven. Place the lid of the Dutch oven and bake for 25 minutes covered. Then remove the cover and bake for another 15-18 minutes depending on how golden brown you like the crust!
- Seventeenth: Remove from the oven and Dutch oven and place on a cooling rack to cool before slicing and enjoying!
*If you don’t have a large measuring cup, be sure to use a bowl that is clear and has tall sides. One that you can easily see when the dough has doubled.
NOTES:
Slicing Sourdough Bread:
- The easiest way to cut sourdough bread with a knife is by first cutting it in half and then placing the cut side down on the cutting board and slicing it. It is so much easier than cutting long slices.
Storing Sourdough Bread
- Store the cooled bread in a bag that is mostly airtight, bread bag or slice and freeze.
- When you thaw out the bread be sure to leave it in an airtight container, so the moisture is absorbed by the loaf as it thaws.
- Like a lot of baked goods, sourdough bread is best the day of. That doesn’t mean however that it isn’t good after that. It still works so well for sandwiches the first couple days and for toast longer than that.

Sourdough Artisan Bread Loaf: A Recipe from the Farm
Ingredients
- 80 g bubbly and active sourdough starter
- 350 g bread flour
- 100 g all-purpose flour
- 300 g distilled or filtered water
- 8 g salt I like to use a salt without a caking agent
Instructions
- First: In a large mixing bowl or the bowl of a stand mixer add your flour and water together and mix the dough until it is shaggy in texture. Let this rest for 45 minutes. This is the autolyse.
- Second: After the 45-minute rest, knead by hand or a stand mixer for 3 minutes and let set covered for 2 hours. (This is the last of the autolyse.)
- Third: After the autolyse is complete. Add the active starter and work into the dough, kneading by hand, for 3 minutes until well incorporated. Let rest covered for 30 minutes.
- Fourth: Add the salt evenly over the top of the dough and poke with your fingers. Then knead the salt into the dough for 2 minutes.
- Fifth: Transfer your dough to an 8-cup measuring cup* cover and let rest 30-45 minutes.
- Sixth: Complete your first coil fold. Rotating a quarter turn and stretching the dough 4 times. Cover with either plastic wrap or a bowl cover and let rest 30-45 minutes.
- Seventh: Repeat this 3 more times for a total of 4 coil folds with 30-45 minute rests in-between. After the last coil fold you will let the loaf rest to finish up bulk fermentation.
- Eighth: BULK FERMENTATION – This varies so much and is the reason that I love the measuring cup to help me ace the bulk fermentation of the loaves. The loaf starts roughly at the 2.5 cup line. In a 69–70-degree room I bulk ferment my loaf for roughly 9 hours. With this temperature I usually let it double in size before I shape it. Use the picture for reference.

- If the temperature of your kitchen is warmer, 72-74 degrees, I would shape your bread at roughly the 4.5 cup line which is more like an 80% rise. I have used Sourdough Journey’s chart, and it has been helpful in getting a handle on my bulk ferment.
- Ninth: Once your dough has reached the proper bulk fermentation it is time to pre-shape your loaf. Working gently, remove the dough from the measuring cup onto a clean work surface. With your hands or a bench scraper, gently, move the loaf in a half circle forming a ball. Be sure you do not rip the dough. Let the dough rest 15 minutes on the counter.
- Tenth: This is the final shape. Make sure your banneton (I like the Batard shape best) is prepped (floured with rice flour or all purpose) before you start this final shape.
- To do the final shape gently flip the loaf over and pulling gently stretch the loaf into a small rectangle. Fold the bottom third of the dough up and the take the left side and fold it to the center followed by the right side. After that you will take and roll the dough up carefully creating surface tension as you go. Seal the ends with your fingers then pick up the loaf with your hand or bench scraper and place seam side up in the floured banneton. Be careful not to rip the dough as you are doing this. You want to keep the surface tension.
- Eleventh: Let sit for 5-10 minutes and then come back and stitch up the loaf as it usually comes apart at the seam. You can do this by taking a little of the dough on one side and pulling it over the seam pressing gently to get it to stick. Continue this until it looks like it is sewn up.

- Twelfth: Place a damp tea towel or a bowl cover over the top of the loaf and place in the fridge. NOTE – I usually put my loaf toward the back of the fridge where it is coldest. Only do this though if you know for sure that it won’t freeze.
- Thirteenth: Let the loaf rest overnight in the fridge for 8-10 hours.
The Next Day
- Fourteenth: Preheat the oven to 500 degrees with the Dutch oven inside a half an hour before you plan to bake the sourdough bread.
- Fifteenth: When the oven has been preheated for 20 minutes remove your loaf from the fridge place a bread sling or piece of parchment paper on top of the banneton and then flip it over.
- Dust the loaf with flour as you prefer and smooth it over the surface. Then do your design score if you want to. (TIPS: try not to go too deep with the bread lame. You want light cuts. Also, make sure your razor blade is sharp.) Once you have completed the design you planned you will then do the expansion score.

- Tips on doing the expansion score: hold the bread lame at a 45-degree angle and cut from one side to the other in one motion. Then starting at the beginning of the score take the blade and cut just under the lip of the dough. This helps you to get a beautiful expansion and “big belly” on your sourdough.

- Sixteenth: Using the bread sling or a sheet of parchment paper as a lifter, lift the loaf into the hot Dutch oven. Place the lid of the Dutch oven and bake for 25 minutes covered. Then remove the cover and bake for another 15-18 minutes depending on how golden brown you like the crust!
- Seventeenth: Remove from the oven and Dutch oven and place on a cooling rack to cool before slicing and enjoying!
Notes
- Store the cooled bread in a bag that is mostly airtight, bread bag or slice and freeze.
- When you thaw out the bread be sure to leave it in an airtight container, so the moisture is absorbed by the loaf as it thaws.
- Like a lot of baked goods, sourdough bread is best the day of. That doesn’t mean however that it isn’t good after that. It still works so well for sandwiches the first couple days and for toast longer than that.
At the end of this all I hope it will help you ace this sourdough loaf. It is well worth putting up with some trial and error to lift that lid for the first time and see a beautiful loaf with a big belly and ear with a beautiful oven spring and then cutting into it and seeing an airy crumb covered in a crispy crust. Be sure to drop your comments below and I will do my best to answer any questions you might have about achieving a great loaf. Also, I love to hear feedback about the recipes so be sure to drop a comment for that too!
Happy Baking!
Mariah Nienhuis | TheFarmChicken
Pleasant word are as an honeycomb, sweet to the soul, and health to the bones.
Proverbs 16:24
Frequently Asked Questions:
Possibly nothing other than the name. Sourdough bread and sourdough artisan bread are frequently used names to describe sourdough bread. However, sourdough bread can also be a sandwich loaf which is an enriched dough whereas an artisan loaf is not enriched but simply flour, water, and salt.
Yes, in comparison to a lot of other breads, sourdough bread is healthier than those. However, it is still a good idea to only eat in moderation.
You want a higher protein bread flour for the best results. I like using a mixture of bread and all-purpose flours to get good gluten strength but also an airy crumb.