The Story Behind our Chicken Coop
You may not know this, but we built our chicken house last year from old barn wood. Most of the wood was salvaged and came from a barn that used to stand on the same yard we live on now. It’s nice to reuse materials when you can but do you know what old salvaged wood means? More work is what it means. Ha! And that is only part of the story behind our chicken coop.
Let’s look at the rest of the story behind our chicken coop.

My husband pounded a lot of nails into this chicken coop and with having such hard wood from being old it wasn’t always the easiest. His grandpa took a lot of the nails out of the boards that he was pounding new nails into.
This project was rewarding but also took longer to come together than we thought. As we were building the coop the chickens were growing and it came down to the wire. They needed a bigger space than the stock tank we had them in and we were just getting to the point that they could move in.
Let’s Explore the Process a Little…
Here are a few pictures of the building of the floor and walls. We used a good old hammer and nails to do this part. Since the wood was salvaged we ended up using bigger boards than we had too. This in turn made the chicken coop quite heavy and very sturdy.
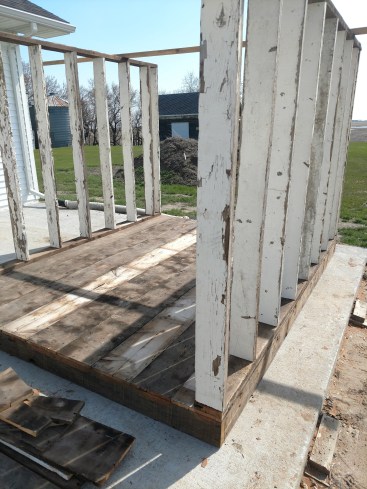
Let me just say that though I did help a lot, this chicken coop was built by my husband. You will see further down that it turns out to be straight and come together nicely. I’m thinking with my muscle, if I was to build this chicken coop alone, it would have had a beautiful*insert sarcasm* lean to it….and probably could have withstood a nice 5 mph wind. Ha! We all know that ND doesn’t produce a higher wind than that right?!
Thankfully that is not how this story ends and my husband is stronger and pickier about the level than I am.
Oh My the Rafters Were Time Consuming!

After the floor was down and the frame was up and done. We moved on to the rafters…wow was this a process. I don’t have any pictures of this but it definitely was the most challenging part. Let’s just say this: If you asked when you would ever use more advanced geometry in real life don’t build rafters because you will soon find out.
It took some trial and error and the internet for help but we figured it out and got the rafters up! It was such a good feeling to get this done.
Next, we sided it with car siding, the roof boards went on and that part James’ dad helped with which was nice. I am not a fan of heights. I can do it if I need too.
The door was built and the wrap went on the roof! At this point the chickens got to move into their new home. They loved their new coop; roost and all!


Have You Ever Moved a Small Building?
Okay, so we had built the coop on our cement slab up by the house for a few reasons but now it was mostly finished and it needed to be moved….this was a job. My husband and father-in-law moved it. It just so happened that the day they moved it, it was very hot and sticky so lots of water and some lemonade later it was happily sitting in its new grassy spot.

You might be wondering what we did with the chickens during this move- they got to ride along on the inside.
Here is a post about the different chicken breeds we have and why we chose them.

Later on that summer my brother and sister-in-law were up and they helped shingle the coop. They left later that afternoon and we finished what was left of the one side. Another thing done!
We then started working on the chicken yard and the chickens were so happy when they had their own little space outside. We cut a little hole in the side of the coop for their door. Did you notice it’s egg shaped?
Time for Nesting Boxes
Once the chickens reached about 20 weeks old we knew we needed to get nesting boxes made so that was next. Here is a picture; simple but just what they needed.

That concludes what we have done so far and with salvaging wood and being creative with some of the leftover lumber from our home being built we spent under $300 to build this chicken coop. Most of that cost was in shingles and fence posts.
It still needs a few minor things before I can say it’s finished. It needs a fresh coat of paint this coming spring/summer. I am thinking red with white trim.
Leave your questions or comments below! Let me know your chicken coop experiences!
And the LORD God took the man, and put him into the garden of Eden to dress it and to keep it.
Genesis 2:15